A funny thing happens when a blogger gets sick – I mean sick enough that the past 4 days have been a blur of tea, broth, kombucha, and lying down. The funny thing is (okay not so much funny, but rather annoying for me!) that I realized I had no “weekly workout” post to write or even weekend highlights to share, since beginning somewhere around 2pm on Thanksgiving, a fever and monster of a respiratory infection knocked me down and kept me down for days.
It’s a little sad to get that sick for Thanksgiving, but actually the timing wasn’t all that bad – I had Adam to help me with the kids and chores, and the long weekend meant I could spend whatever energy I could muster to get my go-to home remedies in order – tea, bone broth, and kombucha.
I still use the same recipe from last year for my bone broth and I’ve continued to have success with it. I wish I’d had some available at the first sign of a sore throat, but better late than never! Today, I’m going to share the method I use to brew kombucha at home, which I’ve been doing for about 4 months now.
*This post contains affiliate links to products I purchased for my own personal use and highly recommend. If you use a link to make a purchase, I will receive a small commission at no cost to you.
What You’ll Need:
- A good SCOBY – SCOBY is an acronym for symbiotic colony of bacteria and yeast, and this is what you use to ferment your sweet tea to turn it into Kombucha! I purchased a Kombucha Kamp SCOBY on Amazon and I would highly recommend turning to Kombucha Kamp when just starting out, since they provide you with instructions, tips, and tricks for successful brewing. If you purchase their starter kit (link above), you receive starter liquid and their special tea blend along with your SCOBY. *The recipe I use to make my kombucha is based on the instructions provided to me in my starter kit.
- Starter Liquid – If you don’t purchase from Kombucha Kamp, make sure you also get starter liquid with your SCOBY because this is essential for the SCOBY to thrive and for you to brew your first batch.
- Filtered water – Make sure you have a good supply of filtered water, since certain minerals in tap water can hurt your SCOBY and ruin your kombucha.
- 2 1-Gallon glass containers – I started out with one of these fermentation jars and quickly realized that I’d need two of them, since once you’re brewing regularly you’ll have enough SCOBYs to brew 2 batches at a time, at least!
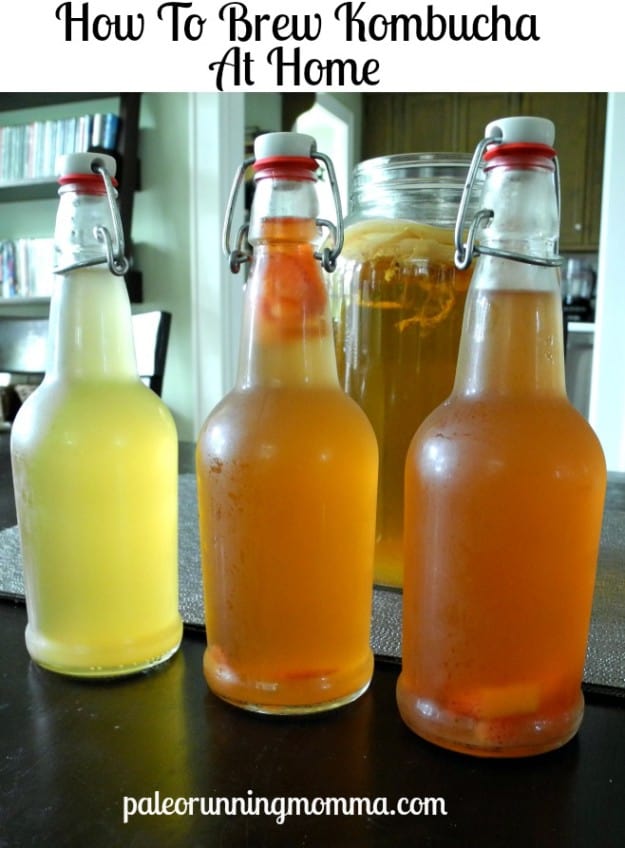
- Glass bottles with lids + a funnel – I know that these bottles (pictured) are very popular for Kombucha! They’re easy to store and clean, too.
- Black tea, green tea, or a combination – Organic is preferable, but not required to brew. I used a combination of green and black for mine.
- Sugar – Plain white sugar is ideal for your SCOBYs – don’t try to attempt “healthier” sugars because apparently SCOBYs do not like this! Just figure your SCOBY is eating most of it – not you.
- Small pieces of fruits and fresh herbs to flavor your brew when bottling – *This is optional
- Cotton kitchen towels and rubber bands to cover the brew.
- A warm, dark (out of sunlight) place for your Kombucha to brew. I use a dark corner of my kitchen.
Start Brewing:
Step 1: With a large measuring cup, measure out 4 cups (1 quart) of cold filtered water. Heat the water until bubbles just form, remove from heat and let sit a few minutes to cool slightly.
Step 2: Add the hot 4 cups of water to your gallon glass container, and add in 5 standard tea bags. I use a mix of black and green organic teas, usually 3 green and 2 black.* Let the tea steep for about 10 minutes before removing tea bags.
*Don’t use herbal tea and don’t use flavored tea.
Step 3: After removing tea bags, add 1 cup of white sugar to the tea and stir until it fully dissolves. Now you will add 8 cups (2 quarts) of cold filtered water to the gallon container.
Step 4: Once you add the 8 cups filtered water, it’s time to add your SCOBY and starter liquid (finally!) Place your SCOBY right on top and pour the liquid over. Place a cotton kitchen towel over the top of the container and secure with a rubber band.
Step 5: Put your brew in a warm and dark, but ventilated location (relatively, at the very least away from sunlight, in a corner) and allow it to sit for 7 days.
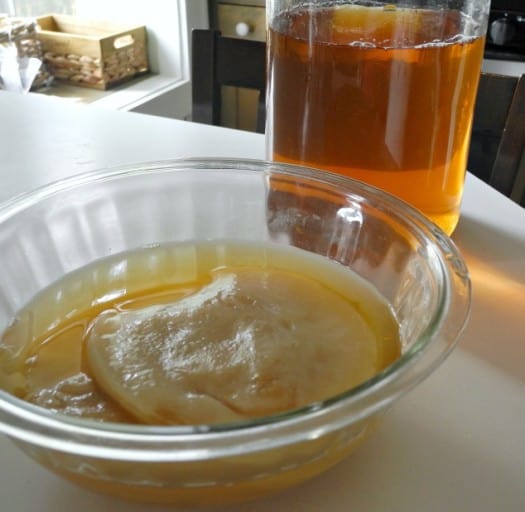
If you check on it part way through the week, you’ll probably be slightly horrified by what appears to be growing! This is not mold or anything bad, it’s simply a “baby SCOBY” forming, and, by the end of the week, it should resemble a younger version of the mother 🙂
Once 7 days is up, you can taste your brew (using a straw slipped underneath the SCOBYs) to decide if you want to begin bottling, or allow it to ferment a few more days. The strength of your brew is a personal preference! Over the summer, 7 days was sufficient, but since it’s gotten colder, my brews have been taking 10 days – 2 weeks to ferment to my liking.
I recently purchased this heating strip to help my kombucha along during the cold winter months! Kombucha Kamp also offers various packages containing items needed for continuous brewing, which is something to look into for sure if you want to do this long term!
Bottling:
When your brew is ready after 7-10 days, it’s time to bottle! This is the fun part for me, since I like experimenting with different fruits for flavoring.
Step 1: To flavor your Kombucha, put small pieces (very small!) of fresh fruit or herbs of your choice directly into the bottles before adding the kombucha. I’ve used apples, strawberries (my favorite), lemon (the juice), ginger, pear, grapes, and blueberries. I also sometimes prefer to keep it simple and original and it’s delicious that way too.
Step 2: Remove the mother SCOBY and baby and place in a shallow dish. Pour 1/2-3/4 cup of liquid from the top of the brew over the SCOBYS.
Step 3: Using your funnel, transfer the kombucha into your glass bottles (if flavoring, the fruit should be in there already.) You can strain the yeast strands if they bother you (or just avoid them.) Keep in mind that berries will cause the Kombucha to bubble more, so leave a bit of room at the top of the bottles.
Step 4: Secure the lids and allow to sit on the countertop for 2 days while the kombucha ferments with the fruit. After 2 days, transfer to the refrigerator to stop fermentation and chill. They will last up to a month, but, mine generally last me less than a week!
Step 5: Start a new brew (back to step 1!) with the mother SCOBY and baby, plus the liquid from the top of the first brew. If you aren’t starting a new brew right away, place a kitchen towel over the SCOBYs and keep them away from light (just as when brewing) to keep them happy!

For more info on brewing kombucha at home, these are great sources:
Do you drink Kombucha?
Do you have questions/concerns about brewing at home?


I’ve been using Mahadev Book for a while now, and the experience has been great. The Mahadev Book Login process is super quick, and I got my Mahadev Book ID within minutes. The Mahadev Book App makes betting really convenient — everything runs smoothly without lag. Definitely a reliable platform for daily betting enthusiasts.
To know more visit : https://mahadevibook.com/